The 6.9 release is planned for 11/18/2009.
Over the last 2 months we've been focusing on improving performance and areas where we needed proactive maintenance as Guild Launch continues to grow. The most important of those changes have been released and we are now ready to move back into refining and improving Guild Launch from a functional perspective.
Over the next 6 months we are going to be taking a strong look at usability, fun and making you the user feel like you are kicking ass when using Guild Launch. To that end we will be adding key features, but the brunt of our development effort will be on making our existing feature set more usable, more adaptable, more relevant, more fun and more kick ass. You will find that a great many of these types of changes fit into the "Other Enhancements" area since they are often focused changes.
Version 6.9 has important enhancements and is shaping up to be one heck of a release. The following is a sneak peak into the upcoming changes:
Pool Based Permissions for Rapid Raid
You can now set permissions for each pool on the permission group. So you can let one person Admin one pool and one person Admin another and they can't mess with the other pools.
Aion Legion Roster Imports from AionOnline.com
We're now pulling in Aion Legion roster info from AionOnline.com
Aion Race & Rank Icons
The icons for the Elyos, Asmodians, Brigadier General, Centurion, Legionaire are now being used on the roster.
Major Application and Recruiting Enhancements
You can now enable an option to request character info from an Applicant. If you do this they are presented with the same info as you see during character creation, but the info is shown on the application. This includes Name, Class, Race, Faction and all relevant info.
This functionality works for all games, but for WoW guilds links to WoW Heroes, be.imba and similar sites will be presented on the application and in the forum post. This way you can learn more about the character. We can extend this to other games in the future.
We also have some other items in this area we aren't ready to announce yet... keep your eyes open for the final release notes.
Better CSS Customization
For those of you who know CSS and like to make your own CSS edits editing a file on your desktop, having to name it a certain way and then uploading it definitely didn't kick ass. It sort of sucked.
So, we've added the ability to directly edit the CSS on your site. You get a textbox, you write the CSS directly into it, you save it. Your site uses the CSS. No magic name, no funny business, just easy editing.
Other Enhancements
* You can now put "www." before a subdomain and the site will redirect you to the correct subdomain.
* WoW guilds can now customize the colors for the class in the simple customization editors.
* The Primary Nav now presents and "Edit Links" link on the primary nav. We hope this will help people find this functionality more readily.
* The Guild Site welcome email has been refined.
* Background Attachment options (fixed, scroll) have been added to the Simple Editors and to the Background upload page.
* Where files are listed from the File Library or a reference to the File Library is made in Admin there is now a corresponding link to the File Library.
Other Fixes
* A broken link on the user profile characters tab has been fixed.
* Guild News permissions have been fixed so that those with "Communcations" rights can add news.
* The required status of an Advanced Application question can now be edited.
Performance Enhancements
* The way that some data is stored has been modified to increase performance.
Wednesday, November 4, 2009
Tuesday, October 20, 2009
Guild Launch Version 6.8.3 Release Notes
Greetings,
This release is planned for just after our normal backup downtime ~8:30 Eastern on Wednesday October 21st.
Version 6.8.3 is primarily a bug fix, tweak and enhancement release.
For this release we are trying something new and putting our release notes on our blog site. The primary reason is because a few users have asked that we make the release notes available for viewing when the site is down for our longer updates. Version 6.8.3 will not requires extended downtime, but we're trying the new blog post method with this release to see how it is received.
In Version 6.8.3 we have:
New Ventrilo Billing Site
All *new* Ventrilo orders will be managed through our new billing site at http://billing.guildlaunch.net/ This site will handle Ventrilo billing better than the current system and gives us more options in the future for payment options, affiliate programs, and other options. Currently, existing Ventrilo subscriptions cannot be moved to the new system because the Subscriptions are not compatible. This does not change the functionality of the servers *in any way* only how the billing is handled.
If you had a server ordered before today then continue to manage the subscription via PayPal. If you order a Ventrilo server today and after today then you will be able to manage it on the Billing site at http://billling.guildlaunch.net/
NOTE: For increased security the billing site requires a new account that is used only for the billing site.
New Templates
- 2 New Champions Templates
- 1 New DC Univers Template
- A Star Trek Online Template
- A Star Wars: The Old Republic Template
Feature Enhancements
- The Shoutbox Widget is now transparent
- The Twitter Widget is now transparent
--- If the above 2 changes conflict with your customization then let us know and we can work with you. It is a vast improvement for most, if not all, templates.
- The shoutbox and Twitter widget will now auto link URLs in them.
- The Twitter widget will now link "@"s to the person's Twitter page.
- The Twitter widget will now link topics "#blahblahblah" to a search for the topic
- WoW Heroes is now on the Game Tools page for WoW
- WoW Heroes is now on the Character Profile for WoW characters
- There is now a "[mp3_player]" BBCode available in the forums. It was introduced for the PugCast Podcast http://www.pugcast.com/ which we are sponsoring and can be seen in action on the homepage of their site. Note: The PugCast is NSFW, but that's their style and their up front about it.
- You can now edit an image's title and description on the Image Details page.
- The DKP page for a character now shows info on which pools they will display in and why they will/or won't display in a given pool. We hope this will help Admins figure this out and will help players see what is required so they can notify Admins.
- New Ony (10 man) and Ony (25 Man) icons are available on the calendar
- The opening page of the Guild Application process now states some more info about the guild and the process.
Bug Fixes
- A few spelling bugs have been fixed
- Warcrafter links for certain realms have been fixed
- All currency types will now display for games that are configured with multiple currencies on the guild bank
- Some pages without proper encoding are encoded properly with utf-8
- Light and Dark forum post backgrounds are now available in the WoTLK full width template
- Item hovers for items with the same name can now be properly displayed with the Item ID without the info being swapped back and forth between the lower iLevel and higher iLevel items.
- Locked sub-forums will now display properly
- Awards are now properly removed from the forums when deleted
Performance Enhancements
- All item hover scripts are now optionally loaded for guilds set to a different games. Put another way only the item hover script for your game shows by default. This was done to improve load times and to not slow GL pages down when external sites are having a problem. This was quite common with War DB and sometimes with WoWHead.
- The WoWHead script has been moved to load at the bottom of the page. This should not effect functionality, but should make the page feel as if it is loading a touch faster. It will also diminish any load time issues they are having on their end.
- We've combined some CSS files into one file to reduce HTTP requests.
Thursday, October 15, 2009
Dust 514 - More Info - Single Shard
More information is available about Dust 514 at a conceptual level now. As things flesh out this game is sounding more and more interesting. I like FPSs, but they aren't a core game of mine as they are with some other people here at Guild Launch. So, the idea of FPS/RPG MMOs intrigues me. I fully believe that Hi-Rez has hit on a good idea with Global Agenda, but Dust 514 looks like another excellent way to merge these genres.
One of CCP's unique strong points is knowledge of how to scale single shard game worlds. Eve Online is one massive game world that routinely holds 10s of thousands of players. CCP will be applying the same technique and experience to Dust 514. My hunch is that if CCP delivers a solid core FPS game then Dust 514 is going to be huge because of the interlinked game play. Their approach is another answer to the question of "How do we bridge FPS and RPG in an MMO environment?". My gut says that CCP has hit on one possible winning approach and you have to have a sister MMO to do it this way. Which means only a few can take this approach. Interesting...
-Stephen
Wednesday, July 29, 2009
GL Pro Tips - How To Admin Your Site, Part 2
On Wednesday, Guild Launch Pro Tips will explore common issues, a look at features as well as creative ideas on how to use the Guild Launch system. This article will be multi-part and is geared to help Administer your site.
Welcome back to How To Admin Your Site. Last week we covered modifying your template and reminded everyone how to do a Roster Import. We have more in store this week so feel free to click the links below to jump ahead:
Recruiting Settings | Guild Application | Recruiting by Class | Widgets | Pictures | Homepage Music
Recruiting Settings
Among the various uses for your Guild Site, Guild Launch provides you with plenty of tools to help you recruit new players to your guild. We even give guilds the ability to post their recruiting information on our Launch Pad community site!
To get started, lets go to your Admin section and click the Members tab. On the left is a section for Recruiting and that is where we are going to spend our time. Click the Main Settings link and we will start there.
Our first option "Is Your Guild Recruiting?" is fairly straightforward. Turning this off will remove the Apply to Guild link on your site as well as the rest of that recruiting area.
The second option "Display the Apply to Guild Link in the default location?" is a touch more involved. Essentially what this will allow you to do is hide the default Recruiting option on the left side of your page and allow you to add a recruiting widget to your site.
What would you want to do that? Widgets can be moved or modified for starters. If you wanted to have the recruiting options on the right hand side of your site, you would need to use this option. To take advantage of this, first turn the Default Recruiting Display off, then go to your Content tab and click the Sidebar Widgets link. On that page, you can add the Recruiting Widget and move it around like all other widgets. See the Widgets section for more information on widgets.
Next is to display your recruiting status on Launch Pad. Do you want to be listed on a page where every Guild Launch member can see your guild is recruiting? If yes, select the Yes option, write a summary about your guild and what you are looking for and you are all set!
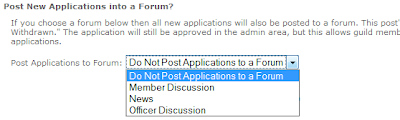
After that, you can configure new applications to be posted in a forum. This is a great way to have your current guild members or Officers discuss an application to be considered before approving or denying it.
You will first need an Application forum if you do not already have one. You can add a forum by going to the Admin section and clicking the Forums tab. Once the forum is created, it will show up in the drop down box and selecting it will post all applications to that forum:
Auto Responses are a great way to save time with your Applications. If you have an auto response set up, it will send a PM to that user containing that information if you approve or decline their application. An acceptance response may direct a user on claiming their character and making a post in the forums for example.
Our last Recruiting Setting is the Launch Code. This is a way to get members from in game to your site without having to submit an application. With the Launch Code, the user could come to your site and instantly have member access without submitting an application.
They only need to use the Launch Code once and they still need to click the Apply to Guild link. The step before the Guild Application will ask if they have a Launch Code and if the proper code is entered, they are all done.
Guild Application
The next item on our list is the Guild Application. We have two different types of Application and you can use either one. The Basic Mode application is simply a text box. You enter your application as you would type it in an email or word processor and your applicant submits that information with their response to your questions. The nice thing about Basic Mode is that the application process is quickly created and easily modified.
In advanced mode, you set up your questions and instructions using various web style fields. This makes the application have forms that are filled out like our account creation process. The Advanced Application also allows you require certain questions be answered before it can be submitted.
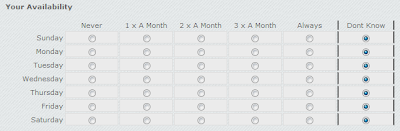
The only option aside from Basic and Advanced Mode is Availability Info. Turning this on gives applicants the ability to list their availability in the application and the form looks like this:
Recruiting By Class
I often receive emails on how to configure this or suggesting that we add this feature. Clicking the Recruiting by Class link on the left of the Members tab in your Admin section will give you these options.
This is fairly straight forward. You enter what class you are looking for, the number or "size word" (like low, medium or high) and determine how it is ordered. Click Add and you are done!
For several games we have Class Icons. So if you play Lord of the Rings Online and type in Minstrel for the class, you will also have the Minstrel icon:
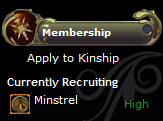
Since we use Partial Matching, I could also list a spec or role. Healing Minstrel would also display the class icon. Balance Druid and DPS Druid would still display the World of Warcraft Druid bear claw icon.
Widgets
Widgets are what give your site content. My first Pro Tip was about the HTML Widget and its limitless uses. We have tons of other widgets and each one will allow you to make your site unique.
To add a Widget, go to the Admin section and click the Content tab followed by the Sidebar Widgets link on the left. To add a widget simply select the widget you want and select its location then click the Add Widget button. You will see the widget listed in the column you placed it, something like below:

As you can see, I added the HTML Widget to my Left Column. Lets talk about the options for widgets.
At the top of the widget is the name, a pencil icon, an arrow pointing right and an X. The pencil icon will allow you to change the name of the widget, who can see it and on which pages it is shown. If you do not want your Guild Description to be shown to current guild members, click the pencil and select Non Site Members Only.
The arrow allows you to change its position. Did you mean to add the widget to the center column or do you want it above or below another widget? Just click the proper direction (up, down, left or right) to move the widget.
The X will remove the widget and all content associated with it. If you added an HTML Widget and included something in that widget, clicking the X will delete that information.
Some widgets have further customization options. The HTML Widget would be useless if we did not put something in it. Same for Raid Progression. For these widgets, go to your site and click the appropriate link. Once there, you can further edit your widget and you are all set.
Pictures
Screen it or it didn't happen! A common phrase in the gaming community. What better place to show off your boss kill or in game accomplishment than your guild site? Maybe you want to show your child's first steps or a picture of your gaming rig.
To show a picture on your site, it first needs to be uploaded to the Internet. I suggest using your guild's File Library if the Admin allows it. If not, there are plenty of places on the Internet to store your pictures.
Once the picture is on the Internet, you need the URL for that image. Go to the picture in question and right click on it. In the menu select Copy Image URL or something similar. The actual text will depend on your browser.
With URL in hand, go to your guild site's forums and make a new post. You will notice there is an icon of a tree and that will allow you to insert an image:

Clicking that icon will put the beginning image tag in your post [img] and you want to paste your URL after that, then click the image icon again. The end result would look something like this:
[img]http://www.google.com/intl/en_ALL/images/logo.gif[/img]
Using the Guild News widget and setting the post as an announcement will allow that image to be displayed on the homepage of your site!
Homepage Music
The last thing I will cover today is adding music to your Homepage. Currently there are two methods to add music to your site, but I will describe only one of them. The reason is the other method is unreliable at best and far more confusing.
The first thing you need is a song on your computer. The song will need to be MP3 formatted to work properly. With your song ready, go to your Gallery and click the File Library tab:
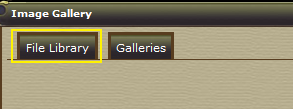
Here, click the Browse button and find the song you want on your site. Once you have found it, upload it and you will see it listed.
Pro Tip - If the file listed does not end with .mp3 it is the wrong type and will not work.
Once your mp3 is uploaded, go to your Admin section and click the Content tab. On the left is a link for Homepage Music. On the Homepage Music page, you should see a drop down box with the file you just uploaded (and any other mp3 files listed in your File Library). Select the song and click set and you are all finished.
That is all this week and wraps up How To Admin Your Site. Get out there, customize your site and make sure to send us your hard work to be featured as a Spotlight Guild! Send your site to newsletter@guildlaunch.com to be considered.
Next week we will take a look at Guild Launch through a Members eyes instead of an Admin. Stay tuned!
~Mike
Welcome back to How To Admin Your Site. Last week we covered modifying your template and reminded everyone how to do a Roster Import. We have more in store this week so feel free to click the links below to jump ahead:
Recruiting Settings | Guild Application | Recruiting by Class | Widgets | Pictures | Homepage Music
Recruiting Settings
Among the various uses for your Guild Site, Guild Launch provides you with plenty of tools to help you recruit new players to your guild. We even give guilds the ability to post their recruiting information on our Launch Pad community site!
To get started, lets go to your Admin section and click the Members tab. On the left is a section for Recruiting and that is where we are going to spend our time. Click the Main Settings link and we will start there.
Our first option "Is Your Guild Recruiting?" is fairly straightforward. Turning this off will remove the Apply to Guild link on your site as well as the rest of that recruiting area.
The second option "Display the Apply to Guild Link in the default location?" is a touch more involved. Essentially what this will allow you to do is hide the default Recruiting option on the left side of your page and allow you to add a recruiting widget to your site.
What would you want to do that? Widgets can be moved or modified for starters. If you wanted to have the recruiting options on the right hand side of your site, you would need to use this option. To take advantage of this, first turn the Default Recruiting Display off, then go to your Content tab and click the Sidebar Widgets link. On that page, you can add the Recruiting Widget and move it around like all other widgets. See the Widgets section for more information on widgets.
Next is to display your recruiting status on Launch Pad. Do you want to be listed on a page where every Guild Launch member can see your guild is recruiting? If yes, select the Yes option, write a summary about your guild and what you are looking for and you are all set!
After that, you can configure new applications to be posted in a forum. This is a great way to have your current guild members or Officers discuss an application to be considered before approving or denying it.
You will first need an Application forum if you do not already have one. You can add a forum by going to the Admin section and clicking the Forums tab. Once the forum is created, it will show up in the drop down box and selecting it will post all applications to that forum:

Auto Responses are a great way to save time with your Applications. If you have an auto response set up, it will send a PM to that user containing that information if you approve or decline their application. An acceptance response may direct a user on claiming their character and making a post in the forums for example.
Our last Recruiting Setting is the Launch Code. This is a way to get members from in game to your site without having to submit an application. With the Launch Code, the user could come to your site and instantly have member access without submitting an application.
They only need to use the Launch Code once and they still need to click the Apply to Guild link. The step before the Guild Application will ask if they have a Launch Code and if the proper code is entered, they are all done.
Guild Application
The next item on our list is the Guild Application. We have two different types of Application and you can use either one. The Basic Mode application is simply a text box. You enter your application as you would type it in an email or word processor and your applicant submits that information with their response to your questions. The nice thing about Basic Mode is that the application process is quickly created and easily modified.
In advanced mode, you set up your questions and instructions using various web style fields. This makes the application have forms that are filled out like our account creation process. The Advanced Application also allows you require certain questions be answered before it can be submitted.
The only option aside from Basic and Advanced Mode is Availability Info. Turning this on gives applicants the ability to list their availability in the application and the form looks like this:

Recruiting By Class
I often receive emails on how to configure this or suggesting that we add this feature. Clicking the Recruiting by Class link on the left of the Members tab in your Admin section will give you these options.
This is fairly straight forward. You enter what class you are looking for, the number or "size word" (like low, medium or high) and determine how it is ordered. Click Add and you are done!
For several games we have Class Icons. So if you play Lord of the Rings Online and type in Minstrel for the class, you will also have the Minstrel icon:

Since we use Partial Matching, I could also list a spec or role. Healing Minstrel would also display the class icon. Balance Druid and DPS Druid would still display the World of Warcraft Druid bear claw icon.
Widgets
Widgets are what give your site content. My first Pro Tip was about the HTML Widget and its limitless uses. We have tons of other widgets and each one will allow you to make your site unique.
To add a Widget, go to the Admin section and click the Content tab followed by the Sidebar Widgets link on the left. To add a widget simply select the widget you want and select its location then click the Add Widget button. You will see the widget listed in the column you placed it, something like below:

As you can see, I added the HTML Widget to my Left Column. Lets talk about the options for widgets.
At the top of the widget is the name, a pencil icon, an arrow pointing right and an X. The pencil icon will allow you to change the name of the widget, who can see it and on which pages it is shown. If you do not want your Guild Description to be shown to current guild members, click the pencil and select Non Site Members Only.
The arrow allows you to change its position. Did you mean to add the widget to the center column or do you want it above or below another widget? Just click the proper direction (up, down, left or right) to move the widget.
The X will remove the widget and all content associated with it. If you added an HTML Widget and included something in that widget, clicking the X will delete that information.
Some widgets have further customization options. The HTML Widget would be useless if we did not put something in it. Same for Raid Progression. For these widgets, go to your site and click the appropriate link. Once there, you can further edit your widget and you are all set.
Pictures
Screen it or it didn't happen! A common phrase in the gaming community. What better place to show off your boss kill or in game accomplishment than your guild site? Maybe you want to show your child's first steps or a picture of your gaming rig.
To show a picture on your site, it first needs to be uploaded to the Internet. I suggest using your guild's File Library if the Admin allows it. If not, there are plenty of places on the Internet to store your pictures.
Once the picture is on the Internet, you need the URL for that image. Go to the picture in question and right click on it. In the menu select Copy Image URL or something similar. The actual text will depend on your browser.
With URL in hand, go to your guild site's forums and make a new post. You will notice there is an icon of a tree and that will allow you to insert an image:

Clicking that icon will put the beginning image tag in your post [img] and you want to paste your URL after that, then click the image icon again. The end result would look something like this:
[img]http://www.google.com/intl/en_ALL/images/logo.gif[/img]
Using the Guild News widget and setting the post as an announcement will allow that image to be displayed on the homepage of your site!
Homepage Music
The last thing I will cover today is adding music to your Homepage. Currently there are two methods to add music to your site, but I will describe only one of them. The reason is the other method is unreliable at best and far more confusing.
The first thing you need is a song on your computer. The song will need to be MP3 formatted to work properly. With your song ready, go to your Gallery and click the File Library tab:

Here, click the Browse button and find the song you want on your site. Once you have found it, upload it and you will see it listed.
Pro Tip - If the file listed does not end with .mp3 it is the wrong type and will not work.
Once your mp3 is uploaded, go to your Admin section and click the Content tab. On the left is a link for Homepage Music. On the Homepage Music page, you should see a drop down box with the file you just uploaded (and any other mp3 files listed in your File Library). Select the song and click set and you are all finished.
That is all this week and wraps up How To Admin Your Site. Get out there, customize your site and make sure to send us your hard work to be featured as a Spotlight Guild! Send your site to newsletter@guildlaunch.com to be considered.
Next week we will take a look at Guild Launch through a Members eyes instead of an Admin. Stay tuned!
~Mike
LOTRO sigs and save/preview buttons released today!
If you happen to go to siglaunch now you will see that LOTRO sigs have been added to the list. With the growing popularity of LOTRO, we decided to give our users the ability to create sigs for it. There are a couple of sweet backgrounds right now and more are on the way so keep your eye's peeled.
Along with the release of lotro sigs, we also make some infrastructural tweaks to sigs in general. There were a ton of sigs created since we launched siglaunch and although these images are rather small in size, the growing number of them being created escalated to a level that we were not expecting this soon. The tweak that we made was the addition of a Save and Preview button. You may make as many changes as you want to the sig by clicking on the Preview button but until you click on the save button, only then will you be given the links to use in the desired forum of your choice.
A script has been created that will delete all sigs that were created using the Preview button and this will most likely run nightly. Don't worry, all of the previous sigs that you've created will not be touched. I repeat, ALL THE SIGS THAT YOU'VE CREATED IN THE PAST WILL NOT BE AFFECTED. We decided to take this approach because of the growing number of sigs mentioned before and the increased size of the newly introduced LOTRO sigs.
We hope you enjoy the addition of LOTRO sigs!
Wednesday, July 22, 2009
GL Pro Tips - How To Admin Your Site, Part 1
On Wednesday, Guild Launch Pro Tips will explore common issues, a look at features as well as creative ideas on how to use the Guild Launch system. This article will be multi-part and is geared to help Administer your site.
Running a guild is not an easy thing to do and I admire successful guilds. We provide a lot of tools to help with that success, so for the next few weeks I will highlight some of our most used features to help new guilds get started and hopefully teach our old dogs some new tricks. Feel free to use the links below to skip ahead.
Guild Logo | Header | Forum Icons | Templates | CSS & CSS Editor | Roster Imports*
*I covered Roster Imports in a previous post and the link above will go to that page.
Every guild is different and we have many ways to customize your site. While almost everything you do on your site is a customization, today I am going to focus on the following: Guild Logo, Headers, Forum Icons, Templates, CSS and our CSS Editor.
Guild Logo
Let us start with Guild Logo. When you create your site, you type in your Guild Name and that name appears at the top on your Header. It is a standard font in white and is usually the first thing a guild changes on their site! This is the Guild Logo on my test site:

The font is basic and the color matches the site, but it does not have the kind of pop most guilds want. The easiest way to change this is by using our Logo Generator located at http://www.siglaunch.com. At Sig Launch, click the Create tab followed by the Create a Guild Logo button.
Here you type in your Guild Name, pick your font, size and desired color then click the Submit button. Below is what I came up with:
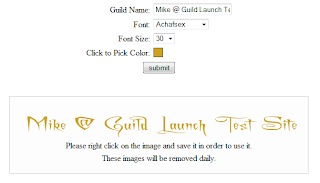
The background to the Logo is transparent, so it will fit nicely on your Header and the text under my logo will not be there. You will need to save the logo to your computer however.
Once you have saved the logo, go to your Admin section and click the Template & Customization tab followed by the Guild Logo / Name Text link on the left. On this page you can upload your new Logo, turn off the logo completely and position your logo left, right, center or the template default. After you submit, you are all done!
Site Header
The Site Header is that big image at the top of your site. Customizing your Header is a touch more involved and requires you use image editing software. There are many different image editing software available, most with free trials.
Once you create your Guild Header, you can upload it by going to your Admin section and clicking the Template & Customization tab followed by the Image Header link. On this page you will find several options for Header placement and background color. You can turn off the Guild Logo, Header position and modify its height.
Pro Tip - Vicki has done an amazing job creating several headers for multiple games. If you go to your Admin section and click the Template tab, you will see a link for the Header Gallery. This page has many of the headers that Vicki created and you are free to use or modify them to fit your site.
Forum Icons
When users think of a guild site, forums are bound to come to mind. All of the icons in your forums can be updated and changed, and we have tried to make that process as easy as possible.
To use your own icons for your forums, you need to first have them on the Internet. I suggest using your Gallery, but you can also use any picture storage site such as Photobucket. Once your replacement icons have been uploaded, go to your Admin section and click on the Template tab followed by the Forum Icons link on the left. You will find a page similar to the one below:
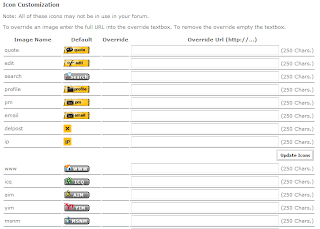 On this page you are going to see a LOT of icons. The good news is, you do not have to replace all of them!
To replace the icon, simply paste the URL for the new icon in the Override URL box. If you wanted to replace your New Post icon for example, paste the following into the box:
http://glmiketesting.guildlaunch.com/resources/doodad_gallery/ageofconan/post.png
Once you click the Update Icons button, you will see the original icon, the new icon and the URL like the picture below:
 Once you have done that, you are all done! If you want to remove that icon just delete the URL and click the Update Icons button again.
Pro Tip - Much like the Header gallery, Vicki has added many icons to a Doodad Gallery that can be found in the Admin section on the Template tab. You can find plenty of icons here that can be used to quickly change your forums around and give them a fresh look.
Templates
When you created your Guild Site, you were given a template based on the game you selected. Did you know we have quite a few more choices? You can change your template by going to the Admin section and clicking the Template tab. On this page are several template choices, but still not all of them!
On the left is a link to Preview & Choose Template and this will give you a drop down so you can see all of our templates. The best part about the templates is that most of them are generic enough to work for any game, just switch out the header!
Templates can be highly customized using CSS or our CSS Editor.
CSS and CSS Editor
The last thing we will talk about today is modifying the CSS of your site. Please note that to take full advantage of this level of customization, you will need a subscription based site.
Modifying the CSS of your site will give you the most ability to change its look and feel and a great many of our sites have done just that. We offer two ways to change your Sites CSS; creating your own CSS file and uploading it and using our editor.
Creating your own CSS from scratch is more advanced and requires working knowledge of CSS on your part. We will be more than happy to answer questions about a class or property, but if you are unable to find where to start you will want to look at our editor.
Once you have created your own CSS, you can upload it by going to the Admin section and clicking on the Template tab. You will see a link on the left for Upload Custom CSS and there you can upload your file.
Pro Tip - For quick answers to the CSS elements on your site, try the Firebug plugin for Firefox. This will help you inspect the different elements on the site and see what we have there by default so you know how to modify it in your CSS.
If you are like me, writing your own CSS is not a project you want to tackle. Fortunately, we offer a CSS Editor. Go to your Admin section, click the Template tab and find the box on the left for Basic Customization:
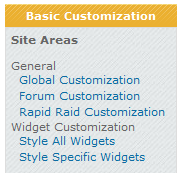 As you can see in the screen shot, there are several different areas you can modify. Each of them is modified in the same manner so I will just go over Global Customization and the ideas apply to all five areas.
When you click on the Global Customization link, the page is broken down into three section. The center content with an explanation. Top-right content for Edit Options with a bunch of links (these are the actual parts you are editing) and the bottom-right with a quick preview.
Note - On Ad Supported sites the editor is limited and only a handful of options in the top-right content are accessible.
Go ahead and click the Guild Name link in the edit options box and your Center content will change. Instead of instructions, you will now see the various options you can edit:
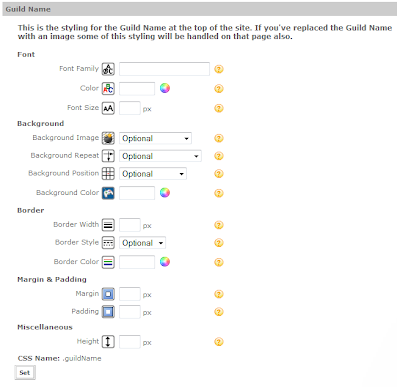
So what are we looking at exactly? There are five Properties, and each of the properties have sub-properties. To the right of each sub-property is a ? that will take you to a page to explain what you can put there. Are you not sure what Margin or Padding is, clicking that help ? will assist you in finding those answers.
Pro Tip - In the top, right-hand corner of your Admin section is a link back to your guild's homepage. If you open that in a new window/tab, you can make modifications in one tab and quickly go to the other and refresh the page to see how it looks.
If you change a setting and just want to go back to the default, simply delete any text in that box and click the Set button. In the case of a drop down, select Optional to clear out your changes.
There you have it. An overview of how to customize your site and a reminder about Roster imports. Get out there and customize your site. Make sure to email your masterpiece to newsletter@guildlaunch.com to be considered for our Spotlight Guild. I will see you all next week with recruiting options, how to use pictures on your site and all about Widgets.
~Mike
Wednesday, July 8, 2009
GL Pro Tips - Using Your Own Domain
On Wednesday, Guild Launch Pro Tips will explore common issues, a look at features as well as creative ideas on how to use the Guild Launch system. This week, Mike will guide you through configuring your domain to work with your guild site.
So you have a Guild Launch guild website and you have a domain (or want to get one), how do you make them communicate? Domain Pointing is an available feature for your guild site and I am going to show you how to get things set up.
First of all, Domain Pointing requires you have two things. The first one is a subscription based site and the other is a domain. The subscription based site is easy, click the Upgrade Site link in the top, left-hand corner of your guild site then follow the steps to upgrade. Any of our premium choices will allow Domain Pointing.
The most difficult part about getting your domain is choosing a Registrar - a company that sells domain names. When shopping for a Registrar keep one thing in mind, they need to support A Record modification. The A Record acts as a traffic sign that directs users to your guild site and is crucial to this process. A quick email to the Registrar's Technical Support will answer that question for you. Since we know both GoDaddy and Network Solutions offers A Record modification we suggest purchasing your domain through them, but any Registrar will work.
With your Subscription based site and your domain ready, lets configure them so they work together. The first thing to do is go to your Admin section and click the Guild Hosting Properties link on the left, then scroll down to the Plan Add-Ons area. At the very bottom of that area is an input box for adding your domain. It starts with www. and an area to type the rest. If you purchased http://www.glmike.com then just put glmike.com in the box. Click the Add Domain button and you are finished with the first part.
The second part of this process is not handled by Guild Launch, but by your Registrar. Because there are so many different Registrars and each of them are different, I suggest emailing their Technical Support staff about setting up your A Record. You will simply tell them you want an A Record that points to the IP Address 74.200.254.228.
Pro Tip - It is often useful with some registrars to set up 2 A Records for your domain, one with www.domainname.com and one without the www. attached. Some Registrars have a setting to allow for both options in one record and this is a question for your Registrar.
The critical aspect of the setup is that when you type the domain with the "WWW" in front of the domain name that it gets to our server. So http://www.glmike.com/ should be pointed at 74.200.254.228 via your A-Record. It is perfectly alright for the short version to point to the site also, but our servers will redirect it to the longer version so that the URLs are uniform.
You are of course free to tackle this yourself, however all questions concerning your domain and DNS modification should be directed to your Registrar's Technical Support. Also note, that changes to your domain can take up to 24 hours to process.
There you have it, that is all it takes to set up your domain so it points to your guild website. If you have questions or troubles with this process you can email me - support@guildlaunch.com
~Mike
Wednesday, June 17, 2009
Image comments in latest release and other stuff...
The image comment feature which I had been working on got pushed out in today's release. Stephen mentioned to me that a lot of our users were asking about this prior to my arrival at Guild Launch and I'm glad that I've been able to take a feature request off the list. Rather than having the page reload after each comment, we decided that using AJAX would be the best approach and having not worked too much with AJAX before, it seem rather straight forward. Really looking forward to using more AJAX in the upcoming projects.
Speaking of upcoming projects...I am getting the plans laid out for LOTRO sigs. There were a lot of things that I learned with the release of siglaunch.com, both good and bad. The plan is to build/tweak on the existing code base for WoW sigs so that creating LOTRO sigs or any other sigs will be a breeze. Incorporating PHP classes into our existing code is also on the horizion and some of the code that I've written has already been using classes.
So keep your eyes and ears open regarding news on LOTRO sigs and other cool stuff coming out.
Wednesday, June 3, 2009
New Ad Campaign In Beckett Massive Online Gamer
Guild Launch is trying a hand at magazine advertising and for the first time ever we are featuring an Ad in Beckett Massive Online Gamer Magazine. Check the ad out, it is on page 77!

Also, in the mags Special Feature section, Beckett has chosen a Guild of the Month to interview and feature in the magazine. Please let me know if you wish for your Guild to be considered for this. First featured guild was The Eternal Watch. Check it out on page 88.

Friday, May 29, 2009
A Week with Support
Some time ago, Stephen blogged about The Guild Launch Development Approach. Today I am going to lead you through a typical week for me at Guild Launch.
My primary role at Guild Launch is Technical Support. I handle all of our support emails and phone calls. Like the rest of the team here, I get to wear many hats so it keeps me on my toes and makes sure I am never bored. Lets take a day by day look.
Monday
Mondays are super busy for me. I have tickets from Friday night through Monday and work extra hard to answer all of the weekends tickets plus the tickets from Monday before I leave. With more than 1 million users, that is a lot of tickets!
Monday is a sacred ticket only day, but like all rules there is an exception to this one - Testing. We do releases on Wednesday and when I test on Monday, it is the second to last day of the testing cycle. To help reduce some of that pressure, sometimes I will come in for a few hours on Sunday.
Tuesday
The first few hours of my Tuesday morning are spent auditing Ventrilo. We have a process that suspends canceled servers on Tuesday and I monitor that process. These servers stay suspended for a few days and are then deleted at the end of the week if they have not been reactivated.
After Ventrilo I work on tickets for most of the day. Because of server maintenance for several games on Tuesday, I tend to have quite a few tickets.
If I am testing, I will spend the majority of my time after lunch finding bugs and working with the new functionality. If by the end of the day I do not feel good about the release or I was unable to test a new feature fully, I will tell Stephen and we will push the release back a week.
Wednesday
Wednesday is our release day and the first thing I do after the release goes out is double check account registration and guild creation, then touch on some of the new features. For the first few hours I monitor tickets very closely while Stephen watches the Support Forums. I wish every release could be perfect and bug free, but I do miss the "edge case" bugs. In our last release, there was a bug with the Shout Box, but that bug only happened when it was placed above the Forums and in testing, I placed it on the left.
If we do not have a release, I knock out the tickets from overnight and work on other things.
Since tickets are a touch lighter I have more time to do other things such as adding new games to our database, learn about add-on development and visit some of your sites. I also read a lot about testing methodology to help solidify our testing process.
Wednesday is also the day I have blocked off for Pro Tips.
Thursday
Thursday is usually the day I start testing, and I start it a week or two before a release. While testing, I will answer tickets and tend to do them in blocks. Test for a couple of hours, answer tickets for a couple of hours.
Much like Wednesday, if there is no testing to do I have plenty of other activities to keep me busy and I generally do the same things; research, add games, learn better methods for testing, etc.
Friday
I treat Friday similar to Monday. It is the last day of the week and I will be out of the office for two days, so I tend to focus on tickets and making sure my box is empty before I leave. Friday is also the day that all of the suspended Ventrilo servers are deleted and I oversee that process.
If I am testing on Friday, I will try to test the larger more complex changes to avoid running out of time on Monday and Tuesday.
At the end of the day, I take a few minutes to organize my desk and make sure I have a plan for the next week. I keep a list of the games I want to add as well as requested games, organize my notes for future feature ideas and side projects and make sure I am ready when I walk in on Monday.
Weekends
The only time I come in the office on a weekend is if I am testing and I feel that I can not finish before Wednesday. I do browse sites from home over the weekend to keep an extra set of eyes on things and will often log into our ticket system to look for any reported downtime tickets.
That is a general look at my week and as you can tell, the majority of my day is spent providing the quality support you have come to expect from Guild Launch. I will be back here on Wednesday with another Pro Tip and in the mean time, keep those emails coming!
~Mike
Wednesday, May 20, 2009
Windows 7, nVidia Drivers & Fan Speed
I recently updated my gaming a.k.a "At Home Mod Development" machine to the Win7 RC1 and then upgraded my nVidia drivers to first set of Windows 7 drivers, then I updated to the 185.85 series and ran into an odd issue. After updating the drivers the back chassis auto-sensing fan on the machine kept revving up and then slowing down. Then 30 seconds or so later it would rev up and slow down. Rinse, repeat, ad nauseum.
After 10 or 15 minutes of this annoyance I reached behind the machine to verify which fan was reving up and when I barely touched the back metal part of the 9800gx2 I just about got my skin burnt. The back was hot as a gun barrel. So, I quickly fired up the nVidia control panel and found somewhere, somehow in the driver updates the fan speed for the 9800gx2 had been set to 0. That's right 0. I expect even at 0 the fan spins just a bit.... but not much and certainly not enough.
So, if you're out there running Windows 7 and/or the newest nVidia drivers check your fan speed you might just save yourself a card replacement.
-Stephen
Tuesday, May 19, 2009
Single World MMOs & Storytelling
Game Set Watch has an interesting article on 'Single Server' MMORPGs. The premise of the article is that sharding is the key factor in the difficulty of creating compelling game wide storylines. If one server makes one decision and another makes the opposite decision how do you release a storyline to the whole community in a compelling and engaging way? We've seen server wide events in World of Warcraft, but they have amounted to instance unlocks and the variance in the storyline has not been the story, but instead it has been the length of time to unlock the next part of the story.
As an Eve Online player I've been fascinated by the tremendous effort they put into their hardware, optimizations, and the "Largest Supercomputer in the Gaming Industry". Eve has some great story arcs if you follow them and they have a great ability to deliver those stories to the player base in their news windows and on their site because they only have to tell one story. I will say that some of the in-game effects of those story arcs are a bit thin. The story arcs happen, you get the news, but you don't always feel a part of it. However, there are other elements than just the stories that the single server allows. Including Eve Radio, which could exist in another game but not with the same connection to the game. Eve radio runs contests and the on-air personalities actually interact with the players directly. The experience would not be the same if the on-air personality had to preface everything with "Player X from Server Y says..." instead they can interact with the entire community. That's very powerful.
Another example is Eve's Council of Stellar Management. This is something that gains alot of power when you consider a single shard environment. CCP can get the playerbase involved and have player representatives elected and not worry about inter-server issues. Sure, they will have politics, but they don't have to create a governing body for each server to make sure they are represented.
Possibly the greatest factor of single shard games though is that each player's actions contribute to the other's game experience. This truly lets the game leverage its playerbase. When a corporation in Eve does something really game changing, such as the downfall of Band of Brothers or the Eve Bank Scandal, that event happend in the *world you play in*, not on some other server. Everything that happens effects you and everything you do effects everyone else. Sure, there are degrees of that effect, but the effect is there and it provides an interesting and engaging element to the game.
If game developers can get their heads and investors around the monetary investment in single server architectures I think we'll see more and more games heading that way. It's definitely something to keep an eye on.
-Stephen
Monday, May 18, 2009
Making Lytebox Work in IE8 - Close, Previous & Next
Update: There is another solution that is a touch cleaner and probably gets more to the root of the issue available here: http://nederveld.wordpress.com/2009/07/02/lytebox-and-internet-explorer-8/
Here at Guild Launch we've been using a wonderful streamlined version of Lightbox called Lytebox. We use it primarily because it's a much smaller download than the other Lightboxes and Lightbox 2 and doesn't require any external libraries such as Prototype or Scriptaculous.
This version hasn't seen much development in the last year or so though. It just works.... until IE8 came out. With the release of IE8 some problems cropped up. Namely, the Close, Previous and Next buttons wouldn't show. After a lot of playing around and testing different things I've found the solution. So without further ado here is how to get Lytebox working in IE8 again.
One thing to keep in mind, this fix is specific to us and removes some of the customization that Lytebox has in its CSS. If you know what you are doing you can adapt the fix to your own customization. We've been using the "Grey" theme so I just tweaked those settings:
Before The Changes
In the current lytebox.css there are these lines for the previous buttons in the Grey theme:
#lbPrev { width: 49%; height: 100%; background: transparent url(images/blank.gif) no-repeat; display: block; left: 0; float: left; }
#lbPrev.grey:hover, #lbPrev.grey:visited:hover { background: url(images/prev_grey.gif) left 15% no-repeat; }
And these for the Next button in the Grey theme:
#lbNext { width: 49%; height: 100%; background: transparent url(images/blank.gif) no-repeat; display: block; right: 0; float: right; }
#lbNext.grey:hover, #lbNext.grey:visited:hover { background: url(images/next_grey.gif) right 15% no-repeat; }
And this for the Close button:
#lbClose { width: 64px; height: 28px; float: right; margin-bottom: 1px; }
#lbClose.grey { background: url(images/close_grey.png) no-repeat; }
The Problem
The crux of the problem is that IE8 isn't recognizing the "Grey" class being applied to the ID by the script. Instead of directly figuring out why that is I just merged the classes together since we always use the Grey theme.
The Fix
For the Previous:
#lbPrev { width: 49%; height: 100%; background: transparent url(images/blank.gif) no-repeat; display: block; left: 0; float: left; }
#lbPrev:hover, #lbPrev:visited:hover { background: url(images/prev_grey.gif) left 15% no-repeat; }
For the Next:
#lbNext { width: 49%; height: 100%; background: transparent url(images/blank.gif) no-repeat; display: block; right: 0; float: right; }
#lbNext:hover, #lbNext:visited:hover { background: url(images/next_grey.gif) right 15% no-repeat; }
And for the Close:
#lbClose { width: 64px; height: 28px; float: right; margin-bottom: 1px; background: url(images/close_grey.png) no-repeat;}
Why does this work?
Enjoy!
Stephen
Here at Guild Launch we've been using a wonderful streamlined version of Lightbox called Lytebox. We use it primarily because it's a much smaller download than the other Lightboxes and Lightbox 2 and doesn't require any external libraries such as Prototype or Scriptaculous.
This version hasn't seen much development in the last year or so though. It just works.... until IE8 came out. With the release of IE8 some problems cropped up. Namely, the Close, Previous and Next buttons wouldn't show. After a lot of playing around and testing different things I've found the solution. So without further ado here is how to get Lytebox working in IE8 again.
One thing to keep in mind, this fix is specific to us and removes some of the customization that Lytebox has in its CSS. If you know what you are doing you can adapt the fix to your own customization. We've been using the "Grey" theme so I just tweaked those settings:
Before The Changes
In the current lytebox.css there are these lines for the previous buttons in the Grey theme:
#lbPrev { width: 49%; height: 100%; background: transparent url(images/blank.gif) no-repeat; display: block; left: 0; float: left; }
#lbPrev.grey:hover, #lbPrev.grey:visited:hover { background: url(images/prev_grey.gif) left 15% no-repeat; }
And these for the Next button in the Grey theme:
#lbNext { width: 49%; height: 100%; background: transparent url(images/blank.gif) no-repeat; display: block; right: 0; float: right; }
#lbNext.grey:hover, #lbNext.grey:visited:hover { background: url(images/next_grey.gif) right 15% no-repeat; }
And this for the Close button:
#lbClose { width: 64px; height: 28px; float: right; margin-bottom: 1px; }
#lbClose.grey { background: url(images/close_grey.png) no-repeat; }
The Problem
The crux of the problem is that IE8 isn't recognizing the "Grey" class being applied to the ID by the script. Instead of directly figuring out why that is I just merged the classes together since we always use the Grey theme.
The Fix
For the Previous:
#lbPrev { width: 49%; height: 100%; background: transparent url(images/blank.gif) no-repeat; display: block; left: 0; float: left; }
#lbPrev:hover, #lbPrev:visited:hover { background: url(images/prev_grey.gif) left 15% no-repeat; }
For the Next:
#lbNext { width: 49%; height: 100%; background: transparent url(images/blank.gif) no-repeat; display: block; right: 0; float: right; }
#lbNext:hover, #lbNext:visited:hover { background: url(images/next_grey.gif) right 15% no-repeat; }
And for the Close:
#lbClose { width: 64px; height: 28px; float: right; margin-bottom: 1px; background: url(images/close_grey.png) no-repeat;}
Why does this work?
Basically I just made an end run around IE8 not rendering the Grey class properly and just made the button be always the Grey set. If you are using one of the other themes just make the same changes using that theme's images.
So, now you have Lytebox working in IE8 the way it should.Enjoy!
Stephen
Tuesday, May 12, 2009
GL Pro Tips - Roster Imports
(Almost) Every Wednesday, Guild Launch Pro Tips will explore common issues, a look at features as well as creative ideas on how to use the Guild Launch system. This week, Mike will guide you through Roster Imports.
Hey gang, I apologize for missing the last two weeks. Things were busy here with testing and all, and I fell a bit behind. Anyway, I am back and today we will talk about Roster Imports.
Two years ago Blizzard released their Armory and Guild Launch Armory Imports were born. Since then, a few other companies have released their own sites with in game character data and we have made sure to include imports for those games as well.
To import your roster, go to your Guild Roster page and you will see a series of links on the left in the Roster Navigation section. The name of the link will change depending on your game, for example - EverQuest II will say, "EQ2 Players Imports". Clicking the proper link will take you to the import page.
The imports page is a little different depending on the game you play and I will cover each of them real quick:
EverQuest II - In order to import your EverQuest II roster, you first need to go to the EQ2 Players site and do a search for your guild. Once you have found your guild page, look at the URL. It should look something like this:
http://eq2players.station.sony.com/guilds/guild_profile.vm?guildId=12345678
The difference is going to be in that red box where the 12345678 is. That number is unique to your guild and that is what you want to use on your Guild Launch site. Copy and paste that number into the EQ2 Players Guild ID field and you are done with the first step.
Lord of the Rings Online - Once you are on the Kinship Roster page, you will see a link on the left for Lotro.com Imports. On that page you will see a field for Guild Name Override and it should be filled in with the name you picked for your site. This name will need to be the same as it is in game and you can change it in this field if it is different. Once that is set, you are done with the first step.
World of Warcraft - On your Guild Roster page you will see two links for imports. The first is Armory Imports and the other is Profiler Imports. Armory Imports will use Blizzard's Armory to grab the data for your guild. The Profiler Imports page uses the Guild Launch Profiler to upload your guild data and is usually more accurate than the Armory since the data is updated as soon as you log off line.
Armory Import - This works just like the Lord of the Rings Online import above. You go to your Guild Roster and click the Armory Imports link on the left. This page will show you the Guild Name as you entered it on the site and can be overwritten by typing a different name. The Armory requires you to input a + where a space would be. Guild Launch would not work, but Guild+Launch would. You can also see what server your set your guild to, though you can not change it on this page.
Profiler Import - Once you have downloaded and set up the Guild Launch Profiler (instructions here), logged in and collected the data it is time to log out and upload the file. You want to go to the Guild Roster page and click the Profiler Import link. On this page you will see your entered Guild Name and a form to browse for the file you need to upload. Confirm your Guild Name is exactly the same as in game with a + where a space would be.
To upload the form, click the browse button and look in the following directory:
"World of Warcraft/WTF/Account/User Name/Realm Name/Character Name/SavedVariables/GuildLaunchProfiler.lua"
User Name is what you type to log in, Realm Name is the server you play on, Character Name is the character you collected the data with. When you are in the Character directory there is a SavedVariables folder, make sure to open that and you should find your GuildLaunchProfiler.lua. Once you have opened that file you will see it listed and click upload. You are all done!
Other Options - On the import pages are a few other options that I will discuss here. None of the imports have all of the following options, so do not be alarmed if you do not see it.
Synchronize Roster - This option will remove characters based on your import data. If a character is claimed by an account or has DKP it will not be removed by this option. This will allow you to have characters represented on your site from different guilds or even different games.
Synchronize Ranks - Checking this box will import the ranks and automatically assign them to the characters. This prevents you from having to manage which character should display what rank and keep track of who changed.
Import Character Gear and Stats - By default, an Armory import only grabs the Race and Class data and nothing else. Checking this will grab all of the gear, stats and spec information for your guild. Using this feature will greatly increase the amount of time an import will take. As such, I only suggest doing this maybe once every few days or once a week with regular imports in between.
Update Basic Tradeskill Info - This option for EverQuest II guilds will grab what professions and the rank for each character. At the time of this writing, Sony does not allow us to get the actual recipe data.
Pro Tip - If you are having trouble importing double check your Guild Name and Server. Go to your Admin section and click the Guild Hosting Properties link on the left to change that information if necessary. LotrO and WoW guilds will need to have their name *exactly* as it is in game and WoW guilds need to have a + in place of a space. Gûild Launch, Guild+Launch and Guild Launch are all different guilds as far as the imports are concerned.
Hopefully this will help you all get your data imported. As always, if you have questions or comments you can email me; support@guildlaunch.com.
~Mike
Hey gang, I apologize for missing the last two weeks. Things were busy here with testing and all, and I fell a bit behind. Anyway, I am back and today we will talk about Roster Imports.
Two years ago Blizzard released their Armory and Guild Launch Armory Imports were born. Since then, a few other companies have released their own sites with in game character data and we have made sure to include imports for those games as well.
To import your roster, go to your Guild Roster page and you will see a series of links on the left in the Roster Navigation section. The name of the link will change depending on your game, for example - EverQuest II will say, "EQ2 Players Imports". Clicking the proper link will take you to the import page.
The imports page is a little different depending on the game you play and I will cover each of them real quick:
EverQuest II
- In order to import your EverQuest II roster, you first need to go to the EQ2 Players site and do a search for your guild. Once you have found your guild page, look at the URL. It should look something like this:http://eq2players.station.sony.com/guilds/guild_profile.vm?guildId=12345678
The difference is going to be in that red box where the 12345678 is. That number is unique to your guild and that is what you want to use on your Guild Launch site. Copy and paste that number into the EQ2 Players Guild ID field and you are done with the first step.
Lord of the Rings Online - Once you are on the Kinship Roster page, you will see a link on the left for Lotro.com Imports. On that page you will see a field for Guild Name Override and it should be filled in with the name you picked for your site. This name will need to be the same as it is in game and you can change it in this field if it is different. Once that is set, you are done with the first step.
World of Warcraft - On your Guild Roster page you will see two links for imports. The first is Armory Imports and the other is Profiler Imports. Armory Imports will use Blizzard's Armory to grab the data for your guild. The Profiler Imports page uses the Guild Launch Profiler to upload your guild data and is usually more accurate than the Armory since the data is updated as soon as you log off line.
Armory Import - This works just like the Lord of the Rings Online import above. You go to your Guild Roster and click the Armory Imports link on the left. This page will show you the Guild Name as you entered it on the site and can be overwritten by typing a different name. The Armory requires you to input a + where a space would be. Guild Launch would not work, but Guild+Launch would. You can also see what server your set your guild to, though you can not change it on this page.
Profiler Import - Once you have downloaded and set up the Guild Launch Profiler (instructions here), logged in and collected the data it is time to log out and upload the file. You want to go to the Guild Roster page and click the Profiler Import link. On this page you will see your entered Guild Name and a form to browse for the file you need to upload. Confirm your Guild Name is exactly the same as in game with a + where a space would be.
To upload the form, click the browse button and look in the following directory:
"World of Warcraft/WTF/Account/User Name/Realm Name/Character Name/SavedVariables/GuildLaunchProfiler.lua"
User Name is what you type to log in, Realm Name is the server you play on, Character Name is the character you collected the data with. When you are in the Character directory there is a SavedVariables folder, make sure to open that and you should find your GuildLaunchProfiler.lua. Once you have opened that file you will see it listed and click upload. You are all done!
Other Options - On the import pages are a few other options that I will discuss here. None of the imports have all of the following options, so do not be alarmed if you do not see it.
Synchronize Roster - This option will remove characters based on your import data. If a character is claimed by an account or has DKP it will not be removed by this option. This will allow you to have characters represented on your site from different guilds or even different games.
Synchronize Ranks - Checking this box will import the ranks and automatically assign them to the characters. This prevents you from having to manage which character should display what rank and keep track of who changed.
Import Character Gear and Stats - By default, an Armory import only grabs the Race and Class data and nothing else. Checking this will grab all of the gear, stats and spec information for your guild. Using this feature will greatly increase the amount of time an import will take. As such, I only suggest doing this maybe once every few days or once a week with regular imports in between.
Update Basic Tradeskill Info - This option for EverQuest II guilds will grab what professions and the rank for each character. At the time of this writing, Sony does not allow us to get the actual recipe data.
Pro Tip - If you are having trouble importing double check your Guild Name and Server. Go to your Admin section and click the Guild Hosting Properties link on the left to change that information if necessary. LotrO and WoW guilds will need to have their name *exactly* as it is in game and WoW guilds need to have a + in place of a space. Gûild Launch, Guild+Launch and Guild Launch are all different guilds as far as the imports are concerned.
Hopefully this will help you all get your data imported. As always, if you have questions or comments you can email me; support@guildlaunch.com.
~Mike
Monday, May 11, 2009
Guild Launch Turns 3 Years Old!
On May 6th Guild Launch turned 3 years old. I had been working on the idea and developing the concept since late 2005 and formed Guild Launch in May of 2006. I started development in earnest and hired our first Developer and Graphic Designer in August of 2006 and released our beta in November of 2006. After a successful beta we went live in January of 2007. Since that time we've seen some incredible growth. When we went live Guild Launch was comprised of 2 servers and a firewall. Over the last 3 years we have grown to 9 servers with more database hardware planned for during the summer.
That growth can be seen in our numbers. Our Forum Signature servers serve over 120 signatures a second at peak. At this time Guild Launch has more than 1.1 million registered users. We've had more than 80 thousand guild sites created and Guild Launch maintains info on more than 4 million characters in more than 100 different games. And people like to use their sites! When World of Warcraft version 3.1 was released and the extended downtime kept extending Guild Launch served more than 2.2 million pages in a single day.
During the last 3 years the Guild Launch Guild Management System has grown dramatically. In the first year we released new versions about every week to two weeks. This was a concerted effort to bring the core features online to our members. During the latter part of 2007 we focused on refining existing features and adding new features. We implemented our profiler mod in 2007, made EPGP additions to Rapid Raid, introduced Ventrilo widgets, server status widgets, and a whole lot more.
During 2008 we made a focused effort to "amp up" existing features. During this time we increased the release timing to two to three weeks to allow for more focused effort and to allow for more testing time. We made significant overhauls to PMs, the forums, widgets, customization, and our profiler mod. In 2008 not a single feature went untouched or unrefined in some way. Later in 2008 we started focusing heavily on our Rapid Raid offering adding even more reporting and making additions to our mods. Also during 2008 we made major improvements to our database hardware and reduced our daily downtime to a weekly event.
2008 also had some challenges. On July 19th, 2008 our office building burned to the ground. As a testament to the resilience of web based companies we all worked from home for two months and since our servers and support system were offsite and our development environments were all virtualized we didn't lose any data other than the print version of our logo and some easily replaceable textures we use. Insurance covered the lost hardware and furniture and we were back in real offices a while later with new computers and desks. Our mantra at this time was "Give me a chair, a flat surface, a computer and an Internet connection and I'm good to go!" Most Guild Launch members didn't realize our offices were a charred mass until later when we had relocated the office and began showing off the new space on the support site. Guild Launch is resilient, and we're here to stay.
Now, in 2009 we've switched to a release schedule of about every 3-4 weeks. We've been working on larger features and doing more refinement during development. In 2009 our multi-game support, and alliance functionality has been a major focus. We've also given a significant boost to our customization with the customization options in the admin area, custom smilies, and section specific customization options and we'll be expanding those features in the coming months. In addition we've been addressing usability site wide and refining the Admin area to be more usable. We've reduced the number of sections in admin to make the separation more clear. We've improved our documentation and we've introduced the http://glmods.guildlaunch.com/ site to give our ever growing number of mods a place to live.
We've also revamped the signature site completely to better handle growth and launched it as a new site at http://www.siglaunch.com. We've released some fun features like the Member Map functionality and as I write this we’re finishing up a release that contains major improvements to roster imports for EQ2, Lotro and WoW and the next few months will see additional Warhammer profile functionality, more Eve Online Functionality and Runes of Magic functionality (to name a few) and further refinements. We have also been expanding our blogging and Twitter use to bring Guild Launch a little closer to you all and to disseminate useful information to our members through creative means. We want you all to feel like you are a part of the community and to get a peek into the constant work we are doing to bring awesomeness to you all.
For the rest of 2009 and beyond we are going to continue to elevate existing features, to develop new features, and to constantly ask the question “Will our users say ‘I Kick Ass’ when they use this feature?” We will be expanding banking features, adding more forum options, an awards system, and more widgets as well as expanding our templates for games such as Runes of Magic, Eve Online, LoTRO, Warhammer, Everquest, Aion, Maple Story and more.
Every release has included heavy input from our members. We're blessed with an awesome member community that provides great feedback and helps us refine and deliver the features you want and that you can use. In every release we make a careful balance between our strategic desires to add features and refine existing features while delivering features specifically requested by our members. I am proud of our team's ability to do this and we'll continue to deliver the features you want and need to make your site management easier, more powerful, more fun and to deliver on our Play > Manage™ philosophy.
We look forward to the next 3 years and the next 20 years of providing you a with an absolute top notch experience at Guild Launch, and the best is yet to come!
Stephen & The Guild Launch Team
Jun, Michael & Vicki
Friday, May 8, 2009
Guild Launch Maps
While I was creating the maps functionality I noticed that as soon as you zoomed to a certain level, a popup would ask you if you wanted to view the map in a bird's eye view. I found this very annoying and didn't think there was a way to disable this. Viola! I have added in some code so that the annoying popup will no longer appear. However, should you still wish to view the map in bird's eye view, you still can by simply clicking on that button. Just saw Stephen's build email so this should get pushed out pretty soon.
Wednesday, April 22, 2009
GL Pro Tips - Primary Navigation
Every Wednesday, Guild Launch Pro Tips will explore common issues, a look at features as well as creative ideas on how to use the Guild Launch system. This week, Mike will help you modify your Primary Navigation.
You know those links on the site that take you to your Forums, Rapid Raid, Guild Roster, etc.? That is called the Primary Navigation and it can be modified. You can add, remove, rename, reorganize and a few other things we are going to talk about today.
The first thing you want to do is go to your Admin section and click the Template & Customization tab. On the left is a link for Primary Navigation and that is where we want to go. For the most part, these options are self explanatory but I will go through each of them.
Current Navigation
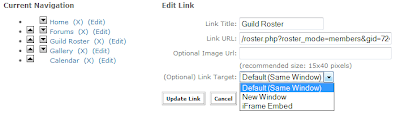
If you have a new site, your list of Current Navigation will be longer than my test site but all of the options are the same. The arrows are used to change the order of the links. The link at the top will appear first in the Primary Navigation while the link at the bottom is last. I note this so site with a horizontal navigation instead of vertical like the list will understand the placement.
Clicking the link name will open the page, clicking the (x) will remove it from the list and clicking (Edit) will open the options to the right in my screen shot. Lets talk a bit about those options.
Link Title is the name that will be displayed in the Primary Navigation and the Link URL is the address of the page. Editing the URL for a Guild Launch default link is not suggested. Editing the Title however is a great way to localize your Primary Navigation if your site is for non-English speaking players.
Some users want an image instead of text in their Primary Navigation and you can use the Optional Image URL field for this. If you do not want to use an image, leave it blank. Make sure the image is uploaded somewhere (Like your File Library) and put the URL of that somewhere in the field.
Pro Tip - If you want to use a unique font for your Primary Navigation, images are the way to do it. Simply create an image and type the name of the link with the font you want. This will make sure every user will view the font you want even if they do not have it on their computer.
The (Optional) Link Target field generates a lot of questions. By default all links will open in the same window and the New Window option opens the page in a second window or tab. But what is this iFrame Embed option? The iFrame Embed option will open your content in the middle of your Guild Launch site with all of your widgets and content on the sides.
The iFrame Embed option is different from Same Window because it will take any page and put it "inside" of your Guild Launch site instead of replacing your site. For a working example, check out the items in your Tools tab. All of those links work using the iFrame Embed option.
Basic Link Types
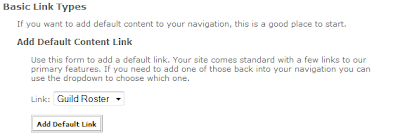
The Basic Link Types are the default links. If you remove the link to the Wiki but want to add it back to your site, you would use this option. Just select the link from the drop down box and click the Add Default Link box.
User Created Links
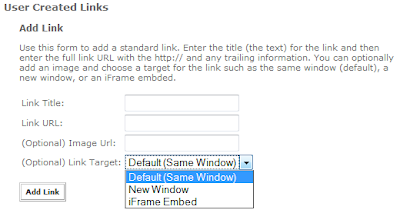
Do you want to have a link in your Primary Navigation that goes to another page such as Google? User Created Links will allow you to do just that. You will notice that User Created Links have the same options that editing a link has. Everything I discussed above applies here except instead of editing the link, you are adding to the Link List.
Custom Site Page
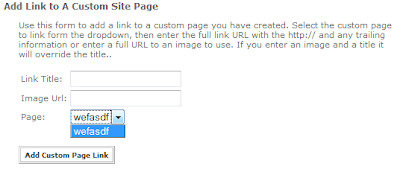
This option will allow you to easily add a Custom Page to your Primary Navigation. Custom Pages are created by clicking the Create Page link in the Site Admin widget on your site:
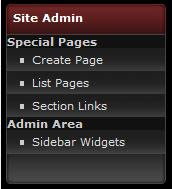
Once the Custom Page has been created, you can use this option to add it to your Primary Navigation.
Hopefully I have been able to clear up some of the confusion about Primary Navigation and point out another tool available to you to customize your site. Comment on this post and let us know what you have done with your Primary Navigation.
Keep those questions coming. See you next week.
~Mike
Wednesday, April 15, 2009
GL Pro Tips - Maps & Character Options
Every Wednesday, Guild Launch Pro Tips will explore common issues, a look at features as well as creative ideas on how to use the Guild Launch system. This week, Mike will discuss two new features in the Guild Launch 6.1 release; Maps and Multi-Class/Spec games.
Hey everyone, welcome back to Pro Tips! I had originally planned today's topic to be about Custom Roster Columns but decided to highlight two of our newest features instead. Not only does Guild Launch offer Maps so you can see where your guild mates are located, but we now support Multi-Class and Multi-Spec games!
Maps. As Jun mentioned, he had been working on adding map functionality to our sites. Using longitude and latitude, you can show your guild where you are located! Maps can be found on the Guild Roster by clicking the (you guessed it), Maps tab. Going there will show you something like:
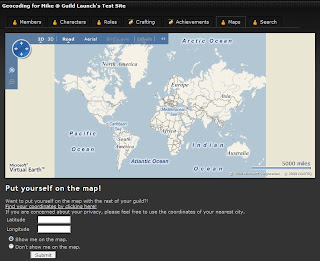
Adding yourself to the map is simple. Click the "Find your coordinates by clicking here!" link to be taken to a new page to find your Longitude and Latitude, then copy and paste that information into the proper text box. Click submit and you are all done.
Pro Tip - For privacy concerns, Guild Launch suggests that you do *NOT* use your actual address. Instead, zoom in to the closest city and place the + in the middle of the screen over it on the map and use those coordinates.
Pro Tip - Being able to add yourself to a map requires you to be logged in *AND* a member of the guild site.
Multi-Class and Multi-Spec. As we grow and start to accommodate features for more games, sometimes we have to change the way our original system works. This feature does just that. Games like Final Fantasy XI, Runes of Magic and Phantasy Star Universe allow you to have a character with more than one class. In World of Warcraft, you can now have multiple specs. As of now, you can display those choices on your Guild Roster.
Now when you add a character to your guild site and your game supports Multi-Class/Spec, you will be presented with the new options as seen in the shots below:
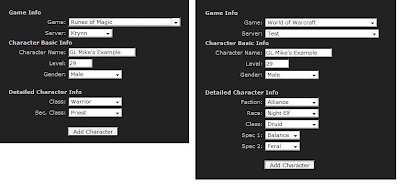
In the Runes of Magic screen on the left, I have selected Warrior and Priest as my two classes since I like to hit hard and not die. In the World of Warcraft screen I am a Druid that has chosen Balance and Feral as my two specs; Balance for raiding and Feral for PvP.
On my guild roster, it will show those choices automatically now so you no longer need to set up Custom Roster Columns to do this! Below is an example:
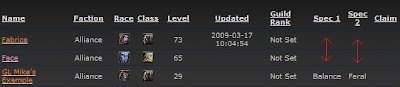
As you can see in that screen shot, there are two characters that do not have any data entered. You can correct this or modify your current information by clicking on the Character name and scrolling down to the Character Info section.
If your game supports Multi-Class and Multi-Spec, but is not representing this when making or editing a character, please email support@guildlaunch.com and let me know what game you play.
That wraps up this week for GL Pro Tips. I have brought to light two of many features we provide. Go back to your Guild Sites and start filling up those maps!
~Mike
Tuesday, April 14, 2009
Cool things coming soon...
After working on sigs, I began researching geocoding. From Google's mapping API to Microsoft's, there's a lot one can do with these robust tools. Originally, I was aiming to integrate Google maps into my project but there are some rules that Google enforces that hindered my development; in order to develop on an intranet you pretty much have to fork out a crap ton of loot for their enterprise version. Having found that out, Microsoft's version seem to fit our needs.
Funny story, I wanted to get this out on our normal release schedule and ran into a snag towards the end of last week and the beginning of this week. I had the code all laid out, inserting into the db but it wasnt showing up on the map. Drove me crazy. Clicking around the map furiously, I guess my finger rolled over the wheel and zoomed the map out. I was focused in on a certain point on the map and the points that I inserted were Cozumel, Mexico and Vernazza, Italy. Nowhere near where I was focused on. The wonderful joys of programming.
We'll be adding more features with mappings but as of right now, you'll have to wait until the code gets pushed out to see what it can do...
Wednesday, April 8, 2009
GL Pro Tips - HTML Widget
Every Wednesday, Guild Launch Pro Tips will explore common issues as well as creative ideas on how to use the Guild Launch system. This week, Mike will discuss how glorious the HTML widget is and describe a few "out of the box" ideas on its use.
If you were to ask me the most exciting addition we have made at Guild Launch, my answer would be the HTML Widget. Almost every widget related request I receive can be accomplished with the HTML Widget and its uses are almost limitless.
Displaying WoWJutsu rank information, Guild Officers, Chat Rooms and even moving your Primary Navigation to the right hand side; it is all possible with the HTML Widget.
The first thing you will want to do is add your HTML Widget to your Guild Launch site. You can add widgets by going to the Admin section and clicking the Add Widget link in the Widgets section on the first page:

Sub Pro Tip - Once you have added a widget you can click the Pencil icon to change the widgets name, viewing permissions and which pages it will display on.
Lets name this widget 'Testing the Awesomeness', and leave all of the other options alone for now. Click your guild name in the top, right-hand corner of the page to be taken back to your Guild Homepage. You should see the HTML Widget named Testing the Awesomeness and an [Edit] link to the right of the title. Click that link and you will see something similar to:

The background color will be different depending on the Template and CSS settings for your site. Think of this as a very simple, Microsoft Word. You can type text, highlight it and click the B button to make the text bold, for example. This is the easiest way to use the HTML widget and is known as WYSIWYG (What You See Is What You Get) view.
If you type something and highlight it, you will be able to turn it into a link by clicking the 3 chain link icon. Using this view, you could easily type a list of Guild Officers and link each name to their Member Profile or add a flash video by clicking the movie strip icon and providing it with a URL.
What if you know HTML or want to paste HTML into the widget to display something such as your WoWJutsu rank icon? Easy! Switch to HTML view by clicking the HTML button. In the pop-up you can insert HTML to display that item on your site. You would also paste your code for an HTML based Chat room in the Code View box.
Remember that the HTML Widgets flexibility is where it is powerful. The Linkbox Widget is great to display your links, but what if you want to use images instead of text? What if you want the text to be colored fireball fuchsia or displayed in a certain order? The HTML Widget solves these problems and is very easy to use.
Comment to this post and show us how you have used the HTML Widget. See you all next week!
~Mike
Subscribe to:
Posts (Atom)